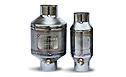

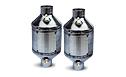
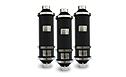


- Diesel Exhaust Scrubber Systems
- 3-Way Catalytic Converters / Catalytic Mufflers
- Propane Exhaust Purifiers
- Purifier Mufflers
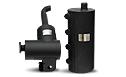
- Muffler Add-on Silencers
- Honda GASPRO SXT Purifier Mufflers
- Parts and Accessories
 Brochure Request
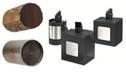
Diesel Oxidation Catalysts
Diesel Oxidation Catalyst – Installation
Table of Contents
- Dieselytic SX/SXC Exhaust Purifier Scrubber Engine Operating Condition Recommendations
- Dieselytic SX/SXC Exhaust Purifier Scrubber Crankcase Oil And Diesel Fuel Recommendations
- Selection of Correct Exhaust Purifier Scrubber Location
- Installation of Dieselytic SX/SXC Exhaust Purifier Scrubber
- Rigging Recommendations for Dieselytic SX/SXC Exhaust Purifier Scrubber
- Cleaning Instructions for Dieselytic SX/SXC Exhaust Purifier Scrubber
1) Dieselytic SX/SXC Exhaust Purifier Scrubber Operating Condition Recommendations:
It is critical to have a diesel engine operating correctly prior to the installation of the Dieselytic SX/SXC exhaust purifier scrubber. We recommend the following actions:
- The diesel engine should be in a very good state of operating condition with respect to overall condition, tuning, repair and maintenance.
- The engine must be operated in strict accordance to engine manufacturer standards, specifications, parts/components replacement, maintenance schedules, maintenance standards, service intervals, etc...
- All engine components and engine component tolerances should be well within the engine manufacturer specifications.
- The engine should not be consuming an unusual amount of lube oil, coolant, fuel or any other engine fluids or any ancillary fluids or other engine materials.
- The diesel, fuel injection systems should be operating properly and should be set to operate well within engine manufacturer specifications.
- A complete tune up prior to installation of the exhaust purifier scrubber is recommended to minimize harmful engine exhaust emissions and provide good purifier scrubber operation and operating life.
- The diesel engine should be maintained on a correct frequency in strict accordance to engine manufacturer specifications and intervals.
- Any diesel engine that is well worn or worn out should be rebuilt prior to installation of the exhaust gas purifier scrubber.
2a) Dieselytic SX/SXC Exhaust Purifier Scrubber Crankcase Oil Recommendations:
For diesel engines we recommend the engine operator use a crankcase oil that is specifically designed for diesel engines. The specified crankcase lubrication oil should be a no ash or low ash (less than 0.50%) formulation specification oil. A low sulfated ash oil content will minimize carbon deposits and port blockage. The crankcase oil should contain no or very low zinc and phosphorus levels in order to prolong the life of the emission control catalyst systems. In addition the crankcase oil should be non-silicone and non-sulfur or non-sulphates. The crankcase oil should feature anti wear additives and anti scuff additives to minimize exhaust valve recession, piston ring wear and wear on piston rings, cylinder liners and engine bearings.
2b) Dieselytic SX/SXC Exhaust Purifier Scrubber Diesel Fuel Recommendations:
The diesel exhaust purifier scrubber is designed to operate with diesel engines which are using Ultra Low Sulfur Diesel (USLD) with a recommend maximum sulfur content of 500 parts per million (500 ppm) available from your local mining diesel fuel supplier or sold at regular on-road service stations.
We recommend that you do not use the following: fuel additives, kerosene, emulsified fuels, biodiesel, marine or any diesel fuel containing more than 15 ppm Sulfur content.
We recommend that the diesel fuel is properly stored and safeguarded to prevent contamination
We recommend that the above ground and underground refueling systems will safeguard the diesel fuel from contamination.
3) Selection Of Correct Exhaust Purifier Scrubber Location:
- The Dieselytic SX/SXC exhaust purifier scrubber should be located as close to the engine turbocharger outlet(s) or exhaust manifold outlet(s) as possible.
- Generally the purifier scrubber should be located no more than 30" to 60" from the engine turbocharger outlet(s) or exhaust manifold outlet(s).
- The Dieselytic SX/SXC exhaust purifier scrubber should be located immediately after the engine exhaust flex hose or flex pipe (after the turbocharger outlet) and before the engine exhaust silencer or exhaust muffler.
- The length of exhaust flex pipe should be 3-5 times the exhaust pipe outside diameter.
- Avoid installing the exhaust purifier scrubber after the engine exhaust silencer or muffler.
- To eliminate harmful engine exhaust gas pollutants as much exhaust heat energy as possible is required for proper purifier scrubber operation. The hotter the engine exhaust gases at the inlet cone of the purifier scrubber the more heat energy is available to oxidize and eliminate harmful exhaust gas pollutants.
- The Dieselytic SX/SXC exhaust purifier scrubber can be installed vertically or horizontally; however horizontal installations are preferred due to less overall stress acting upon the sheet metal canning of the exhaust purifier scrubber.
- Do not allow the exhaust purifier scrubber to contact any structural members of the engine, enclosure or any other equipment.
- Avoid locating the exhaust purifier scrubber in close proximity to electrical components, fuel tanks or any combustible materials.
- We recommend that the full length of the interconnecting exhaust pipe, the flex pipe and the purifier be fully insulated with commercially available heat insulation blankets. Contact the sales office for information regarding a wide variety of available heat insulation blankets.
4) Installation of the Dieselytic SX/SXC Exhaust Purifier Scrubber:
To properly install the Dieselytic SX/SXC exhaust purifier scrubber we recommend the following steps:
- Remove all packaging material from the exhaust purifier scrubber. Safely remove the exhaust purifier scrubber from the shipping skid with the appropriate hoisting or lifting device. Place the exhaust purifier scrubber onto a level floor.
- Determine the ideal exhaust purifier scrubber location based on the information detailed in section 3).
- Refer to the attached dimensional drawings of the Dieselytic SX/SXC exhaust purifier scrubber to determine the amount of exhaust pipe that will have to be removed for purifier scrubber installation.
- Cut the appropriate length of exhaust pipe from the existing engine exhaust system. The length of the exhaust pipe length to be removed should be equal to the overall length of the exhaust purifier scrubber. The required pipe length to be cut will vary depending on the particular exhaust purifier scrubber model. Avoid installing the purifier on badly rusted and/or weak exhaust pipe.
- Use the directional flow arrow on the exhaust purifier label to correctly orient the exhaust flow direction of the Dieselytic SX/SXC exhaust purifier scrubber.
- Do not weld onto any other part of the exhaust purifier scrubber body.
- Refer to section 5) for rigging recommendations for Dieselytic SX/SXC exhaust purifier scrubbers.
- Using new termination flanges and gaskets butt the revised exhaust system to the inlet and outlet flanges of the Dieselytic SX/SXC exhaust purifier scrubber.
- Install 12 new 7/8"-9 NC grade 5 bolts with washers, nuts and lock washers (or material equivalent) into each of the flange terminations. Torque the 7/8"-9 NC nuts in a "crossed manner" to a torque setting of approximately 40 ft-lb (54 Nm). Gradually increase the torque steps in a "crossed manner" to a specified bolt assembly torque of 300ft-lb (407 Nm) to 360ft-lb (488 Nm).
- Start and idle the engine for a period of 15 to 20 minutes. Shut down the engine. Allow the engine to cool. Re-torque the 7/8-9 NC bolts to the correct torque specification. Re-start the engine and check for any exhaust gas leaks. Double check the bolt torque specification on a regular interval to minimize any potential exhaust leaks.
- Once installation of the Dieselytic SX/SXC exhaust purifier scrubber is complete the total engine exhaust gas backpressure restriction should be measured. Use a backpressure gauge/manometer (0 to 40" H20 range) to measure and record the total exhaust gas flow restriction at high idle and full load engine operation. Remove the 1/8" NPT brass plug located at the 1/8" NPT port on the inlet cone of the purifier. Install the 1/8" OD metal tube probe (with a 1/8" NPTM thread) of the backpressure gauge manometer into the 1/8" NPT port to a depth of approximately 3.0" to 5.0". Start the engine and operate the engine at high idle and full load conditions. Measure and record the exhaust gas backpressure restriction at high idle and full load engine operation. Ensure that the total exhaust gas backpressure restriction at full engine load is within the engine manufacturers recommendations.
- Once installation of the Dieselytic SX/SXC exhaust purifier scrubber is complete the differential engine exhaust backpressure restriction should be measured. Use a backpressure gauge/manometer (0 to 10" H20 range) to measure and record the differential exhaust gas backpressure restriction at high idle and full load engine operation. Remove the 1/8" NPT brass plug located at the 1/8" NPT port on the inlet cone of the purifier. Remove the 1/8" NPT brass plug located at the 1/8" NPT port on the outlet cone of the purifier. Install the 1/8" OD metal tube probe (with a 1/8" NPTM thread) of the backpressure gauge manometer into the inlet port and the outlet port of the purifier. Install the metal probe of the exhaust backpressure restriction gauge to a depth of 3.0" to 5.0". Start the engine and operate the engine at high idle and full load conditions. Measure and record the differential exhaust gas backpressure restriction at both high idle and full load conditions.
- We recommend that the total and differential engine exhaust gas backpressure restrictions at high idle and full load should be monitored on a monthly basis.
- We recommend that the inlet exhaust gas temperatures and the outlet temperatures of the Dieselytic SX/SXC at high idle and full load should be monitored on a monthly basis. Any significant change in the temperature rise is an indicator of possible problems in engine operating conditions.
- The Dieselytic SX/SXC exhaust purifier scrubber is now ready for use.
5) Rigging Recommendations for the Dieselytic SX/SXC Exhaust Purifier Scrubber
To install the Dieselytic SX/SXC exhaust purifier scrubber you will have to rig the exhaust purifier scrubber to a lifting device. Use minimum 3/8” diameter Grade 30 proof coil chain attached to a crossbar which is then attached to your lifting device. Make sure the chain rigging is strong and able to adapt to the shape of the load. Care should be taken when using chain slings because sudden shocks will damage them. This may result in sling failure and possible injury to workers or damage to the load.
Workers involved in hoisting and rigging must exercise care and safety when selecting and using slings. The selection of slings should be based upon the size and type of the load, and the environmental conditions of the workplace. Slings should be visually inspected before each use to ensure their effectiveness. Improper use of hoisting equipment, including slings, may result in overloading, excessive speed (e.g., taking up slack with a sudden jerk, shock loading), or sudden acceleration or deceleration of equipment. Workers involved in hoisting and rigging operations should receive training in the following:
- Sling and hitch types
- Sling capacity determination
- Equipment inspection, care, and maintenance
- Load weight and center of gravity determination
- Safe lifting techniques
Once you have received proper training on using your equipment you now can prepare to install the exhaust purifier scrubber.

5a) Materials Needed For Proper Installation of Dieselytic SX/SXC Exhaust Purifier Scrubbers
- Hooks Clevis Hook, Grab, 3/8”, 2650 Lb, Grade 30
- Chain 3/8” Grade 30 proof coil chain
- Crossbar
- Safety glasses
- Safety Shoes
- Hard Hat
- Certified Machine Operator
5b) Rigging Instructions for Dieselytic SX/SXC Exhaust Purifier Scrubbers
Step 1: Remove all packaging material from the exhaust purifier scrubber. Safely remove the exhaust purifier scrubber from skid with the appropriate hoisting or lifting device. Place the exhaust purifier scrubber onto a level floor.
Step 2: Install the clevis hooks (Grab style, 3/8”, 2650 Lb, grade 30) into the 1.5” lift holes located on the top of the exhaust purifier scrubber body. (See installation drawing)
Step 3: Hook the 3/8” grade 30 chain onto the clevis hooks. Mount your chain to a suitable crossbar which will be attached to your lifting device. At this time the exhaust purifier scrubber should still be situated on the floor.
Step 4: It is important to rig the load so that it is secure and stable.
Step 5: Check your lifting device manual for the maximum weight your machine can operate safely.
Step 6: With your lifting device lift the exhaust purifier scrubber to where there is no slack in the chains, but the exhaust purifier scrubber is still on the ground.
Step 7: Check all chains and hooks for any defects before the exhaust purifier scrubber is lifted. Once you have confirmed that there are no defects in any of your lift equipment., lift the exhaust purifier scrubber about one foot from the floor to make sure the load is stable and horizontal.
Step 8: Once everything has been safely checked, you can proceed with the lifting and positioning of the exhaust purifier scrubber into place. Avoid installing the purifier on badly rusted and weak exhaust pipe.
Step 9: The purifier should be securely mounted. Tighten and double-check all of the flange bolts and have your safety operator sign off that the product and all equipment is correctly in position with all the proper hardware.
6) Cleaning Instructions for Dieselytic SX/SXC Exhaust Purifier Scrubber
Accumulations of carbon and ash will accumulate on the catalytic core of the Dieselytic SX/SXC exhaust purifier scrubber. The accumulation of carbon and ash will increase the engine exhaust backpressure restriction which will reduce engine performance and increase engine exhaust emissions. If the current differential exhaust gas backpressure restriction increases by 50% in relation to the clean differential exhaust gas backpressure restriction, cleaning of the catalytic core is required. To clean the catalytic core the following procedures are recommended:
- remove the 7/16-14 NC bolts, nuts, washers and lock washers which retain the catalytic core to the inlet and outlet end cones of the exhaust gas purifier scrubber.
- use a small pry bar and a rubber mallet to carefully separate the catalytic core flanges from the inlet/outlet cone flanges. Once separated carefully slide the catalytic core assembly from the inlet and outlet assembly.
- once separated use a metal scraper to clean the flange gasket surfaces and file any gouges in the gasket surface flat with a fine file. Sand the flange gasket surfaces of the catalytic core and the inlet/outlet cone with 80 grit sand paper.
- clean the catalytic core using Cleaning Procedures "A", "B" or "C".
- install new gaskets and nuts and bolts as required.
- torque the 7/16"-14 NC nuts and bolts in a crossed manner to a starting torque of 10 ft-lb (14 Nm).
- gradually increase the bolt assembly torque in a crossed manner to a final setting of 45 ft-lb (61 Nm).
- re-install the complete exhaust purifier scrubber into the engine exhaust system.
- start the engine and check for any apparent exhaust gas leaks.
- shut down the engine, allow the exhaust purifier scrubber to fully cool and re-torque the catalytic core nuts and bolts to a setting of 45 lb-ft (61 Nm).
Cleaning Procedure “A” – To clean light accumulations simply use a compressed air flow with a maximum nozzle pressure of approximately 70 to 80 PSI (482 kpa to 550 kpa). Use a soft rubber tipped nozzle and apply the air flow directly to the inlet and outlet faces of the purifier core. Wear an approved high quality respirator (such as NORTON model 100 or SIEBE NORTH model 7700 or equivalent), overalls and eye protection. Perform the cleaning procedure in a well ventilated area that is not sensitive to soiling. Initially direct the air flow into each cell of the core outlet face. Repeat until the purifier core is free of deposits.
Cleaning Procedure “B” – To clean heavy accumulations of deposits place the purifier into an oven capable of achieving a temperature of 1050 F (565 C). Use an air atmosphere and allow the purifier core to maintain a 1050 F (565 C) temperature for a period of 4+ hours. Usually a pottery kiln or a metal heat treating oven will be suitable for this particular procedure. Following the heating process, allow the purifier core to cool to ambient temperature and repeat procedure “A” to remove any ash deposits.
Cleaning Procedure “C” – An alternate method of cleaning heavy accumulations of deposits is to use a combination gasoline or diesel fuel "bath", compressed air flow and soft nylon brusher. Firstly the inlet/outlet faces of the purifier core are carefully brushed clean with a soft nylon brush. Compressed air flow is then directed into the inlet/outlet faces of the purifier core. The purifier core is then submerged into a container of gasoline or diesel fuel for a period of at least 12 hours. The purifier core is removed from the gasoline or diesel fuel container and soaked in hot water for a period of 1 hour. The purifier core is then fully dried with compressed air. Repeat the procedure as required. Observe strict safety procedures when using gasoline or diesel fuels.
- Diesel Exhaust Scrubber Systems
- Diesel Oxidation Catalysts
- Diesel Particulate Filters
- 3-Way Catalytic Converters / Catalytic Mufflers
- Propane Exhaust Purifiers
- Purifier Mufflers
- Muffler Add-on Silencers
- Honda GASPRO SXT Purifier Mufflers
- Parts and Accessories
Brochure Request